
Custom Hydration Wizard WPF
I decide to refresh all my Windows Forms project into WPF Application, I start with my first Application Custom Hydration Wizard
1. Remember Hydration Kit
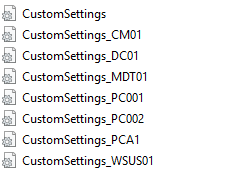
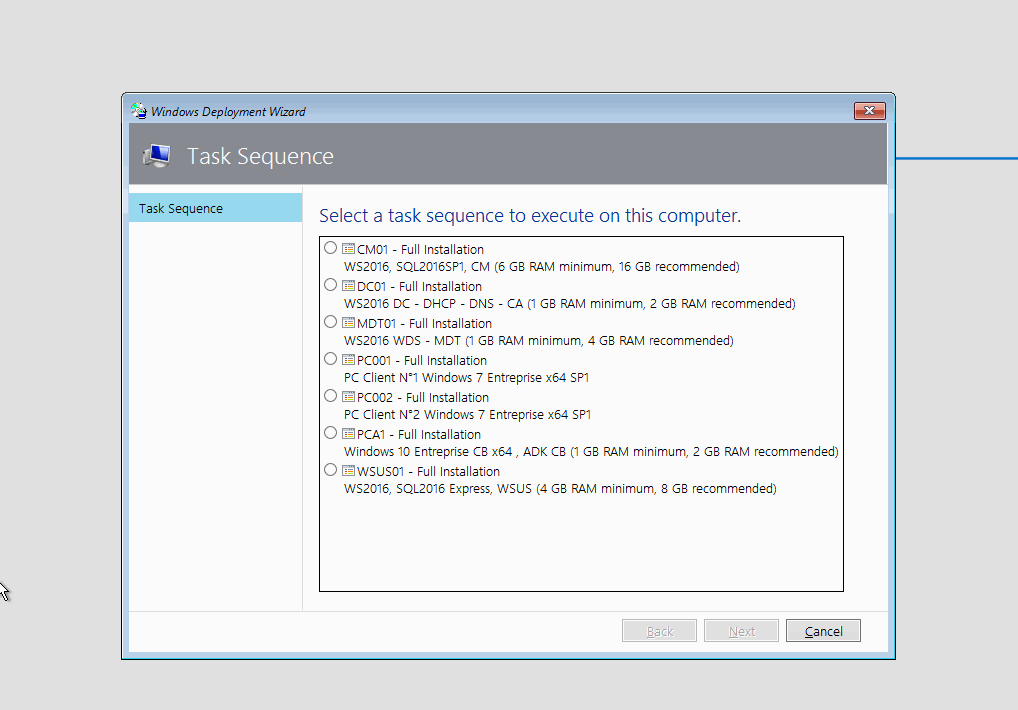
In all Hydration Kit made by Johan Arwidmark you must change all customsetting.ini for all Task Sequence. For each virtual machine, there is an INI file that populates the machine-specific information, they are located in the Deploy\Control\ directory of the DVD or USB bootable they are named in the following way :
- CustomSettings_“ID Tasksequence“.ini
With This Application you can personnalize all the Value during the Tasksequence. Be carefull if you want to make this all the MDT application can use this modificiation, they must be fully variable.
2. Windows Form Application
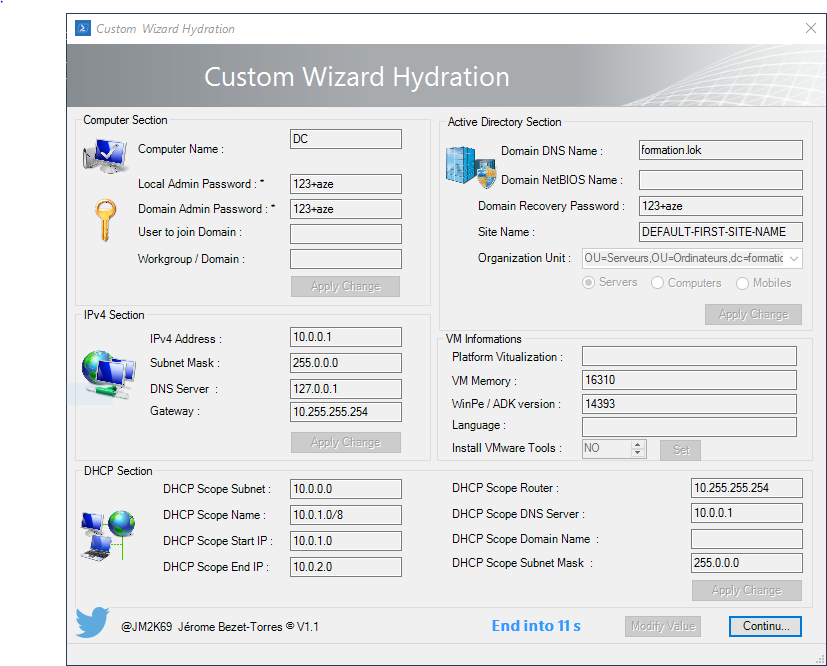
To create the application I use PowerShell Studio. I decide to modernize the Interface with Mahapps and more easy to maintain.
If you don’t have the Software you don’t maintain it.
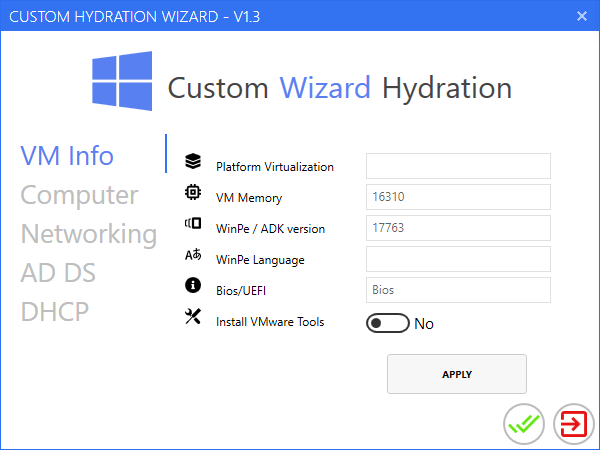
3. WPF Application
I use Mahapps to create this modern Application with XAML. In this version I remove the countdown, now you can modify value when you want.
3.1 Part VM Info
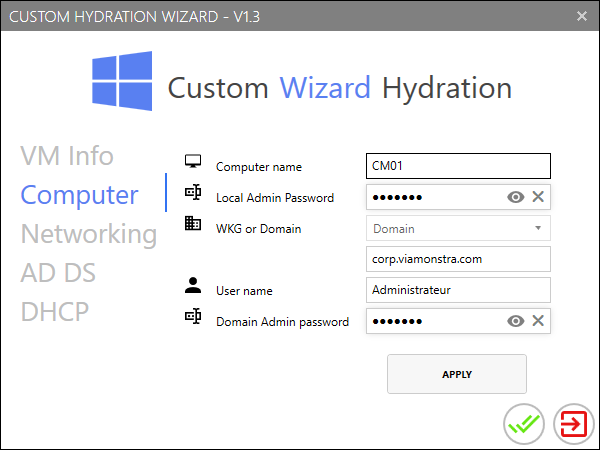
3.2 Part Computer
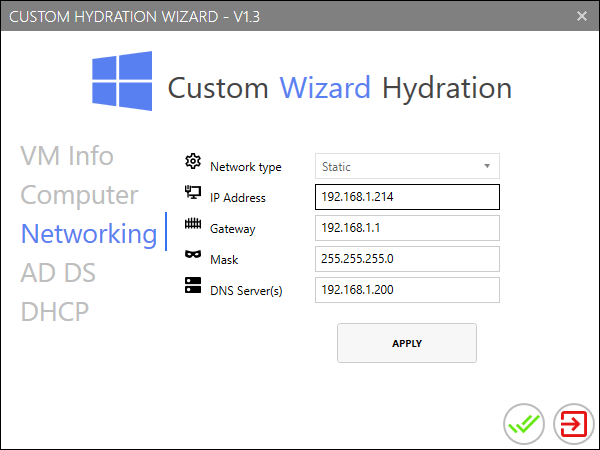
3.3 Part Networking
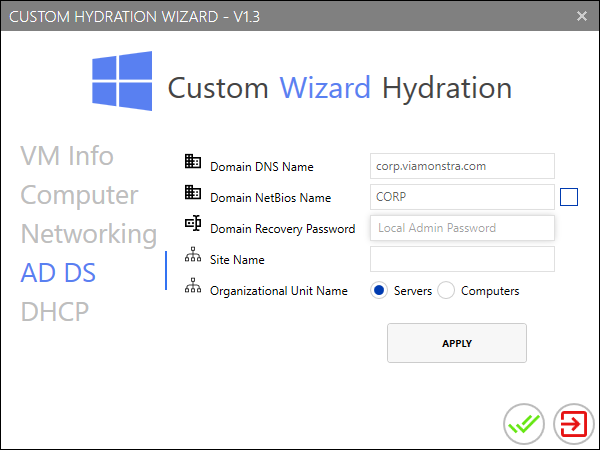
3.4 Part Active Directory
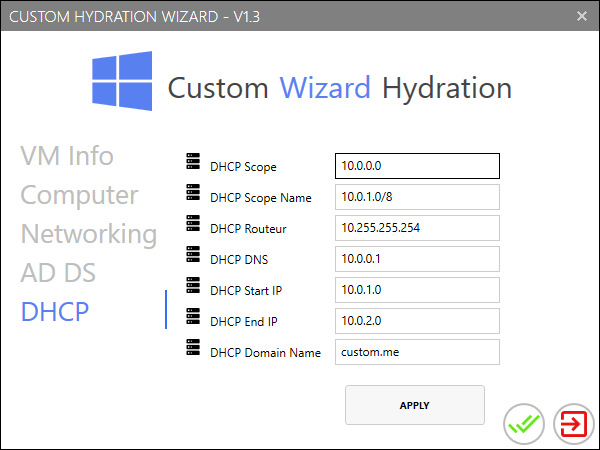
3.5 Part DHCP
4. How to use my Script
4.1 Download the script
The script is available in my github repository Here.
Please don’t forget to Unblock Files
To use it you can first Unblock File or you use the Apps from [MVP] Damien Van Robaeys here ;-) …
get-ChildItem -recurse | Unblock-File
Be carefull if you use the latest ADK 1809 there is some problem with WPF in WinPe there is some workaround :
4.2 Use with MDT
- First you need to extract the Archive copy the content of the Folder WPF Application to your
Script Folder

-
Second For all your Taskquence you need to add
OneAction.- Add Powershell Run Script
- %SCRIPTROOT%\CWH\Run_CWH.ps1
The content of the script :
- Add Powershell Run Script
powershell.exe -sta -executionpolicy Bypass -file CWH.ps1

5. Demo Time
Written by Jérôme Bezet-Torres @JM2K69.