

Customize HydrationKit
Today we are going to talk about the HydrationKit maintained by Johan Arwidmark @jarwidmark which allows you to set up a complete modern deployment environment for operating systems.
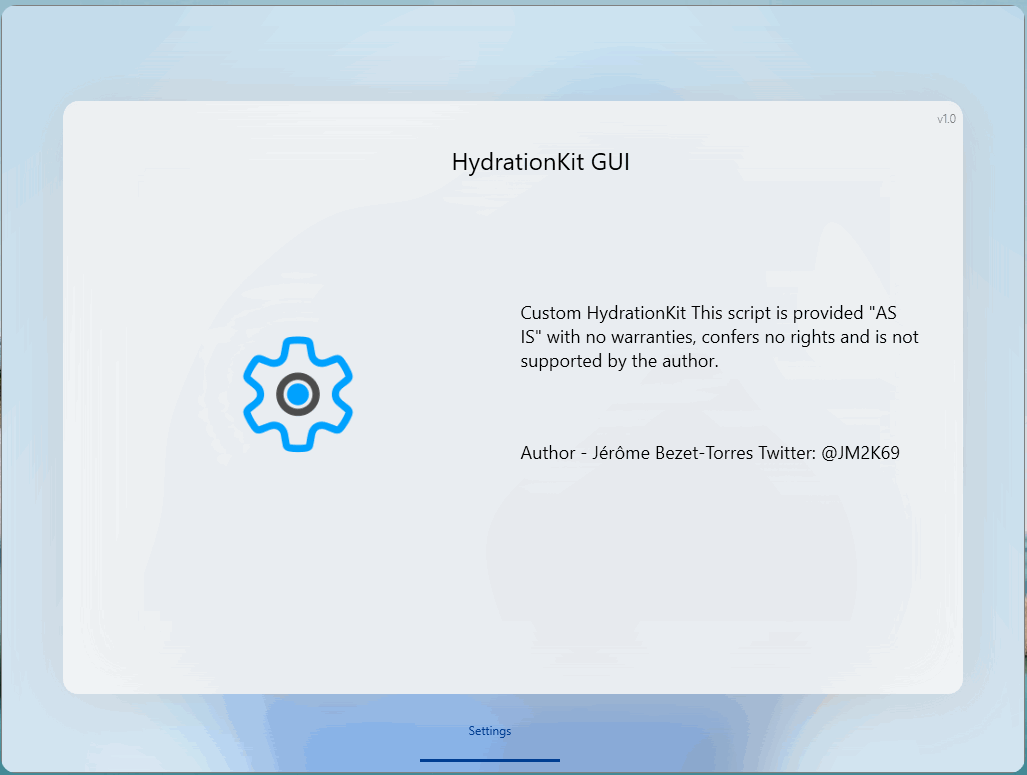
To start I created two WPF applications with MahApps and PowerShell of course. They allow you to modify the complete environment of the hydrationKit.
You can modify the following parameters:
- Computers Name
- Network addresses
- Domain Name
- DHCP configuration
- Passwords
To use these two applications you have to wait a little more because Johan 😉 has not yet released the version based on Windows Server 2022. Simply because all MDT applications must be complement variables.
1. First Application
1.1 How it work’s
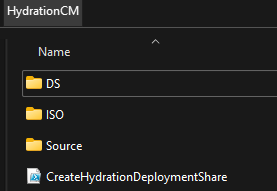
This application uses the Windows 11 style. It must retrieve the directory created by Johan’s script on the creation of a HydrationKit tree.
The data for each task sequence is stored in the directory ..ISO\Content\Deploy\Control
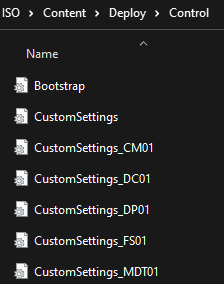
Each TS has its own CustomSettings_XXX file where XXX is the name of the TS
for example the value for the DC01
[Settings]
Priority=Default
Properties=HydrationOSDComputerName

[Default]
HydrationOSDComputerName=DC01
JoinWorkgroup=WORKGROUP
OSDAdapterCount=1
OSDAdapter0DNSServerList=127.0.0.1
OSDAdapter0Gateways=192.168.1.1
OSDAdapter0IPAddressList=192.168.1.200
OSDAdapter0SubnetMask=255.255.255.0
OSDAdapter0TCPIPNetBiosOptions=1

; Active Directory Configuration
ReplicaOrNewDomain=Domai
NewDomain=Forest
NewDomainDNSName=corp.viamonstra.com
DomainNetBiosName=VIAMONSTRA
ForestLevel=4
DomainLevel=4
AutoConfigDNS=Yes
ConfirmGC=Yes
CriticalReplicationOnly=No
;DatabasePath=D:\NTDS
;ADDSLogPath=D:\NTDS
;SysVolPath=D:\SYSVOL
SafeModeAdminPassword=P@ssw0rd
SiteName=NewYork

; DHCP Configuration
DHCPServerOptionRouter=192.168.1.1
DHCPServerOptionDNSServer=192.168.1.200
DHCPServerOptionDNSDomainName=corp.viamonstra.com
DHCPScopes0SubnetMask=255.255.255.0
DHCPScopes0IP=192.168.1.0
DHCPScopes0Name=192.168.1.0/24
DHCPScopes0StartIP=192.168.1.100
DHCPScopes0EndIP=192.168.1.199
DHCPScopes0OptionLease=691200
DHCPScopes=1
The WPF Application parse just this files :
- CustomSettings.ini
- CustomSettings_CM01.ini
- CustomSettings_DC01.ini
- CustomSettings_MDT01.ini
- CustomSettings_FS01.ini
- CustomSettings_DP01.ini
Here my PowerShell functions to parse and create an ini file
Function Parse-IniFile ($file) {
    $ini = @{}

    # Create a default section if none exist in the file. Like a java prop file.
    $section = "NO_SECTION"
    $ini[$section] = @{}

    switch -regex -file $file {
      "^\[(.+)\]$" {
        $section = $matches[1].Trim()
        $ini[$section] = @{}
      }
      "^\s*([^#].+?)\s*=\s*(.*)" {
        $name,$value = $matches[1..2]
        # skip comments that start with semicolon:
        if (!($name.StartsWith(";"))) {
          $ini[$section][$name] = $value.Trim()
        }
      }
    }
    $ini
}

function Out-IniFile($InputObject, $FilePath)
{
    $outFile = New-Item -ItemType file -Path $Filepath
    foreach ($i in $InputObject.keys)
    {
        if (!($($InputObject[$i].GetType().Name) -eq "Hashtable"))
        {
            #No Sections
            Add-Content -Path $outFile -Value "$i=$($InputObject[$i])"
        } else {
            #Sections
            Add-Content -Path $outFile -Value "[$i]"
            Foreach ($j in ($InputObject[$i].keys | Sort-Object))
            {
                if ($j -match "^Comment[\d]+") {
                    Add-Content -Path $outFile -Value "$($InputObject[$i][$j])"
                } else {
                    Add-Content -Path $outFile -Value "$j=$($InputObject[$i][$j])"
                }

            }
            Add-Content -Path $outFile -Value "" -Force
        }
    }
}
When you make a change the ini file is modified accordingly and then you have the possibility to go to the next TS.
Don’t forget to update your media when you have made change with the tools.
When you make a change a backup is created in the same directory with the tool you can restore all changes.
1.2 How to use it
Nothing beats a little demonstration.

My first application is available on Github here
2. Second Application
2.1 how it work’s
The second application is totally different since it is an MDT application, so when it is launched it will access all the variables created by MDT and modify them on the fly, then save them in the VARAIBLES.DAT file.
During the task sequence to access the variables you just have to execute these powershell commands:
$tsenv = New-Object -COMObject Microsoft.SMS.TSEnvironment
# to find a value for the variable HydrationOSDComputerName in the File CustomSettings_DC01 for example
$tsenv.Value("HydrationOSDComputerName")
2.2 how to add this application
This WPF Application must be copy in the Scripts folder in you DeploymentShare
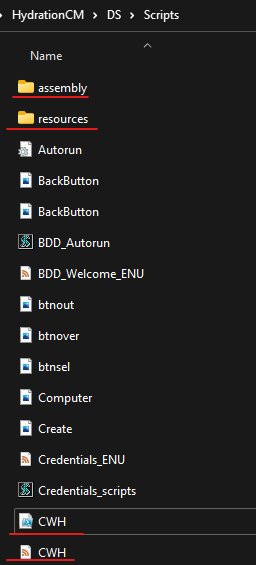
I forgot in the screen capture to mention the PowerShell script Run_CWH.ps1 to copy into the Scripts folder.
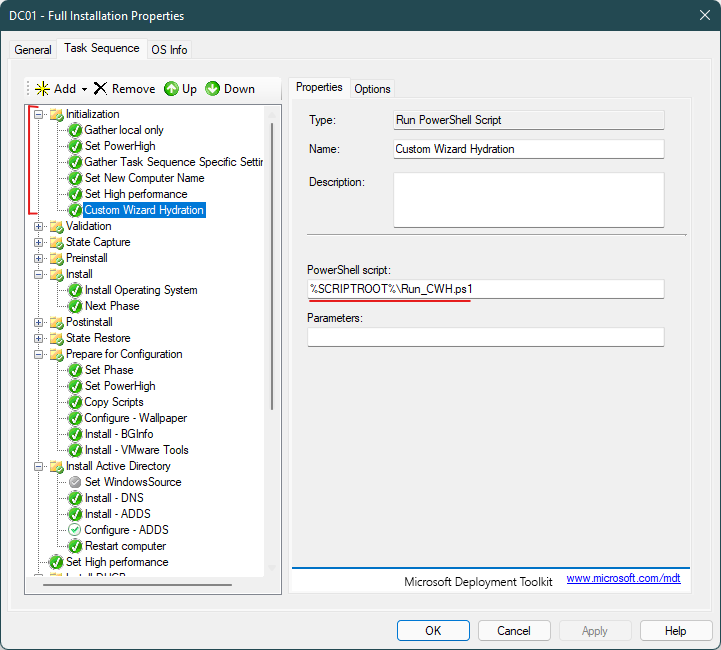
2.3 how to use it
Here is how to add the script in MDT but especially at which place in each TS.
2.4 Small demo

My first application is available on Github here
Thank’s for reading.🤗
Written by Jérôme Bezet-Torres @JM2K69.